Data Factory – Move files to time folder structure
Scenario:
I have a folder full of CSV files. Each file name is a date for which this file contains data (i.e. 2021-10-01T00:00:00Z). I want to organize these files into folders, with a time hierarchy. Meaning, the top level folders will be years (2022, 2023…), the second level will be months in this year (1,2,3…12), and the next level will be folders for a day in a month (1,2…30/31/28). Each day folder will contain one or many files with data referencing that day.
This Structure is important because it will enable you to use partitions when reading that data with tools like SQL serverless pool or spark pool in Synapse. You can read only the data required for the current query and save time and resources.
In this post, I’ll use Azure data factory to copy the files to the new structure. I’m assuming the files are already on an Azure storage account, in one container, and we want to build the new folder structure on another container.
Let’s launch data factory and create a new pipeline.
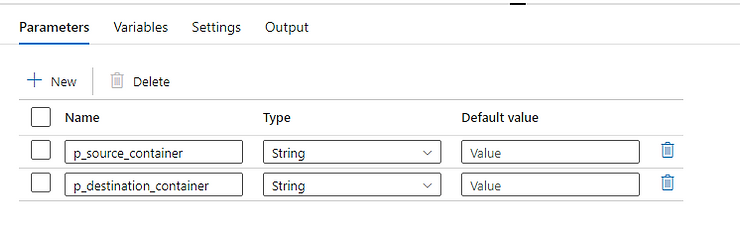
First, we’ll add 2 parameters, to hold the containers names (source and destination)
We’ll use a metadata activity to get a list of files in our source folder, so drag this activity into the canvas.
In the new metadata activity, on the settings tab, under “field list” click on new and add “child items”.
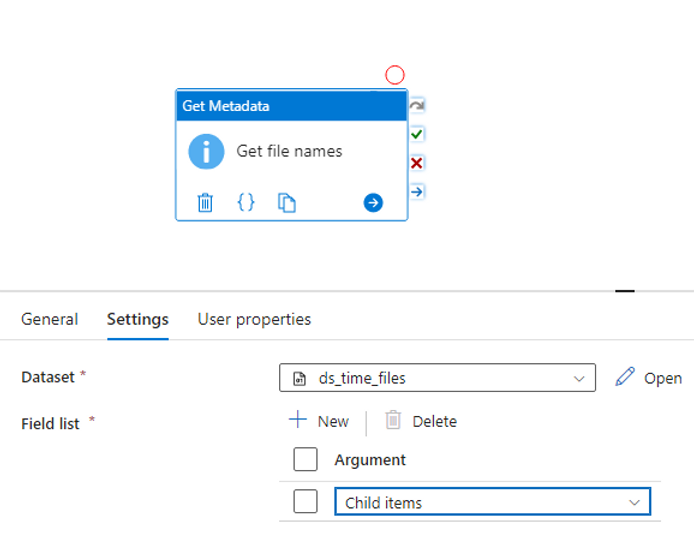
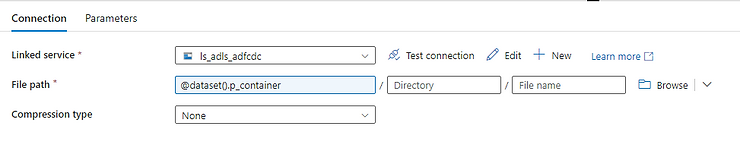
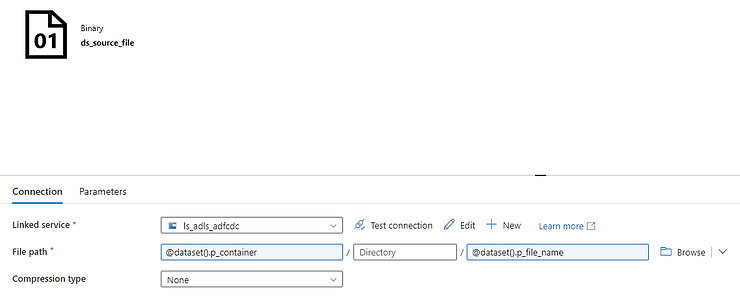
Create a dataset to your source folder of type blob storage or data lake storage. Set your container to the parameter we added. Leave the directory and file name blank. The file type can be binary since we are only copying the files, and not accessing their content in this pipeline.
Now add a foreach activity, and connect it with a success (green) link from the metadata activity.
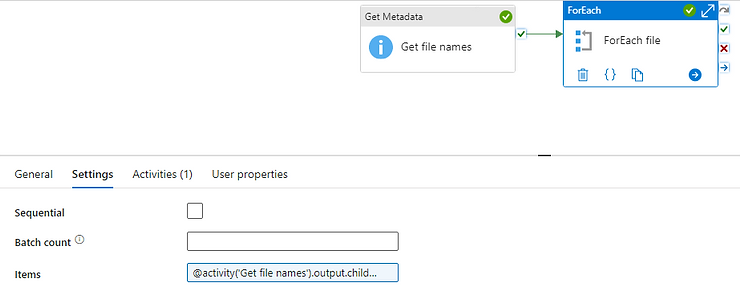
On the items field, type in:
@activity('Get file names').output.childItemsThis will make the foreach activity loop on each result (which is one for each file in the source folder)
Click on the + sign inside the foreach activity to add an activity that will run for each file, and then click “copy data”.
Click on the copy data activity you just added, to get It’s settings.
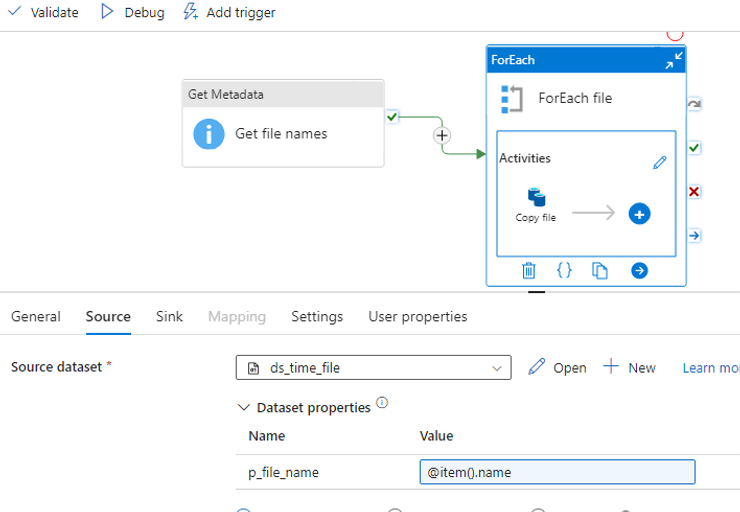
On the source tab, create a new dataset, with the same properties as the one we created for the metadata activity, except now we’ll add a parameter to the file name.
Use this dataset in the source tab. A new parameter appear under the dataset for the file name. Click on “dynamic content” and write @item().name . This expression will take the file name in each loop.
You can check “delete files after completion” if you want the source files to be removed after successful copy.
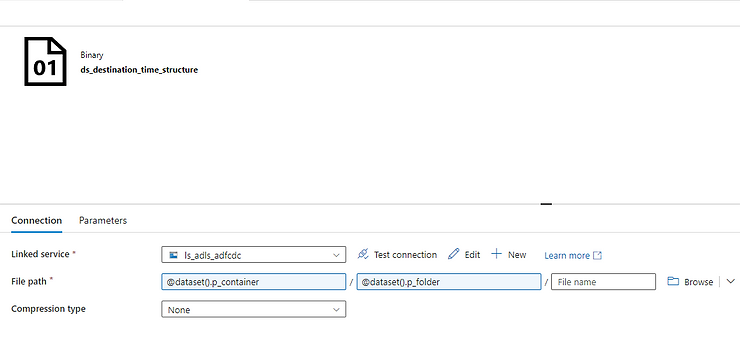
Now on the sink tab, we need to create a new dataset to our destination folder. I am using Azure data lake storage. This time we are creating a parameter on the container and folder parts, leaving the file name blank.
Back on the sink tab, you now can insert a value for the dataset parameters. For the folder value, Click on “dynamic content” and paste in this:
@concat(
  formatDateTime(item().name ,'yyyy'),
   '/',
   formatDateTime(item().name ,'MM'),
   '/',
  formatDateTime(item().name ,'dd')
)
Explaining the expression:
Item().name is the file on the current loop. Something like 2021-10-01T00:00:00Z.
formatDateTime extract part of the timestamp string,
and concat brings the all folder path together.
In our example, that will be 2021/10/1 (the / symbol show moving to a different folder level)
Our pipeline is ready, let click on debug to test it.
We’ll need to supply the parameters, which are the names of our source and destination containers.
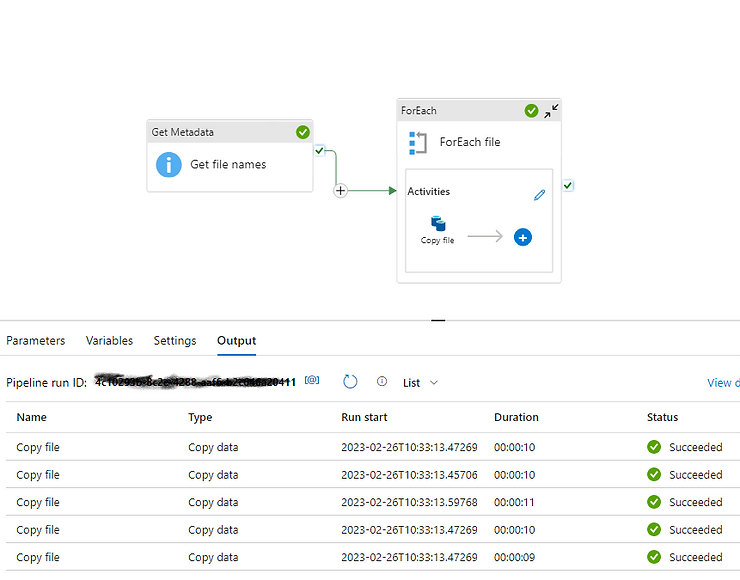
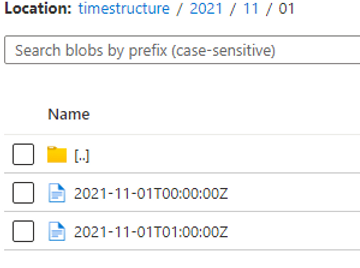
Our pipeline works and copied the files to the right folders (while creating those folders)
Reference – https://www.madeiradata.com/
Leave a Reply