How can we load multiple(50)tables at a time using azure Data Factory?
Here are the important steps to create this solution:
- Select the watermark column: Select one column for each table in the source data store, which can be used to identify the new or updated records for every run. Normally, the data in this selected column (for example, last_modify_time or ID) keeps increasing when rows are created or updated. The maximum value in this column is used as a watermark.
- Prepare a data store to store the watermark value: In this tutorial, you store the watermark value in a SQL database.
- Create a pipeline with the following activities:
- Create a ForEach activity that iterates through a list of source table names that is passed as a parameter to the pipeline. For each source table, it invokes the following activities to perform delta loading for that table.
- Create two lookup activities. Use the first Lookup activity to retrieve the last watermark value. Use the second Lookup activity to retrieve the new watermark value. These watermark values are passed to the Copy activity.
- Create a Copy activity that copies rows from the source data store with the value of the watermark column greater than the old watermark value and less than the new watermark value. Then, it copies the delta data from the source data store to Azure Blob storage as a new file.
- Create a StoredProcedure activity that updates the watermark value for the pipeline that runs next time.
Here is the high-level solution diagram:

Prerequisites
SQL Server. You use a SQL Server database as the source data store in this tutorial.
Azure SQL Database. You use a database in Azure SQL Database as the sink data store. If you don’t have a database in SQL Database, see Create a database in Azure SQL Database for steps to create one.
Create a data factory
- Launch Microsoft Edge or Google Chrome web browser. Currently, Data Factory UI is supported only in Microsoft Edge and Google Chrome web browsers.
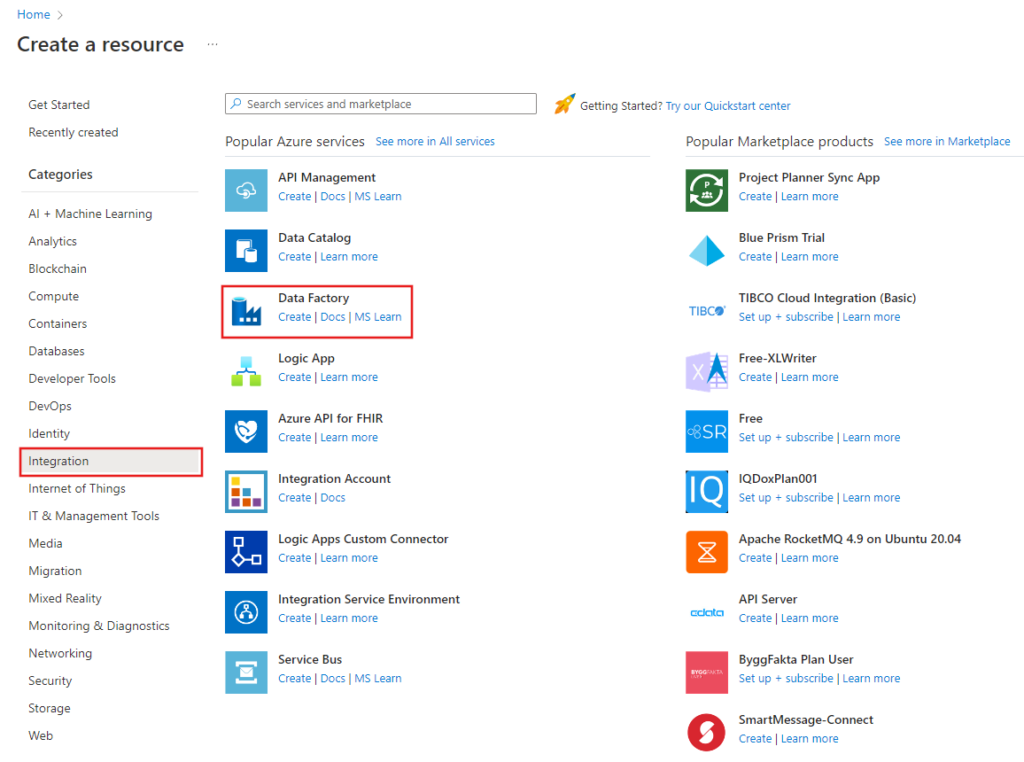
- On the left menu, select Create a resource > Integration > Data Factory:
In the New data factory page, enter ADFMultiIncCopyTutorialDF for the name.
The name of the Azure Data Factory must be globally unique. If you see a red exclamation mark with the following error, change the name of the data factory (for example, yournameADFIncCopyTutorialDF) and try creating again.
4. Select your Azure subscription in which you want to create the data factory.
5. For the Resource Group, do one of the following steps:
- Select Use existing, and select an existing resource group from the drop-down list.
- Select Create new, and enter the name of a resource group
6. Select V2 for the version.
7. Select the location for the data factory. Only locations that are supported are displayed in the drop-down list. The data stores (Azure Storage, Azure SQL Database, etc.) and computes (HDInsight, etc.) used by data factory can be in other regions.
8. Click Create.
9. After the creation is complete, you see the Data Factory page as shown in the image.
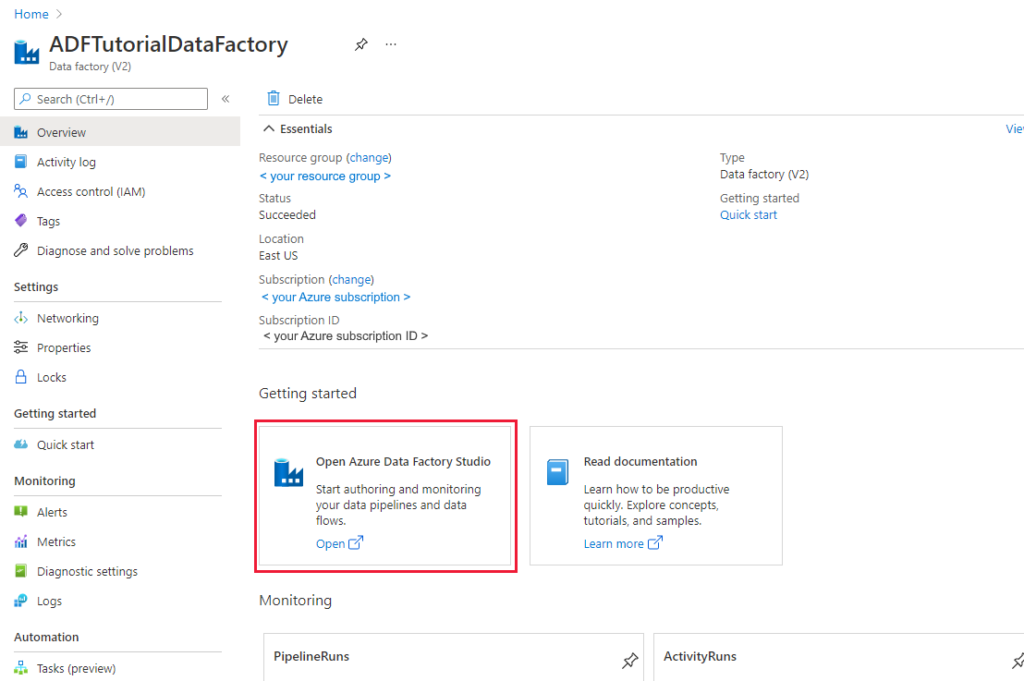
10. Select Open on the Open Azure Data Factory Studio tile to launch the Azure Data Factory user interface (UI) in a separate tab.
Create self-hosted integration runtime:
As you are moving data from a data store in a private network (on-premises) to an Azure data store, install a self-hosted integration runtime (IR) in your on-premises environment. The self-hosted IR moves data between your private network and Azure.
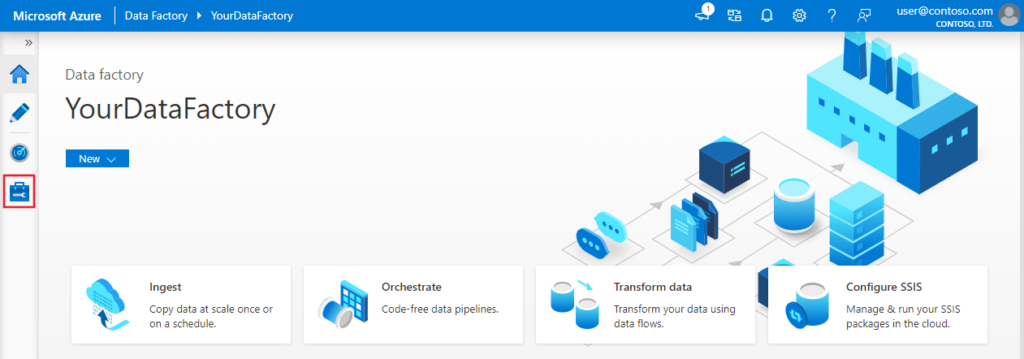
- On the home page of Azure Data Factory UI, select the Manage tab from the leftmost pane.
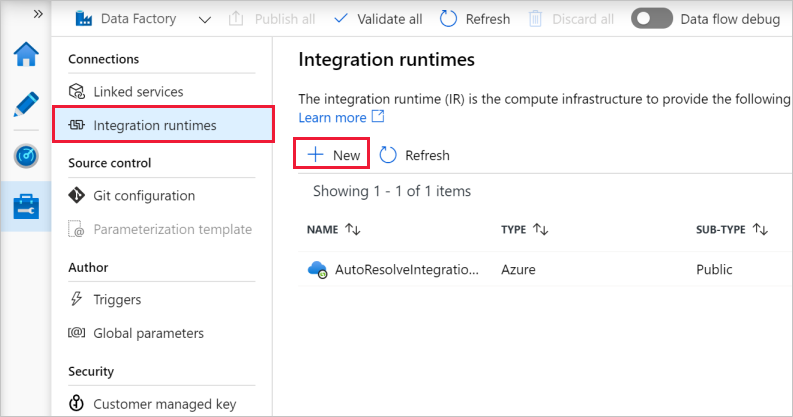
2. Select Integration runtimes on the left pane, and then select +New.
3. In the Integration Runtime Setup window, select Perform data movement and dispatch activities to external computes, and click Continue.
4. Select Self-Hosted, and click Continue.
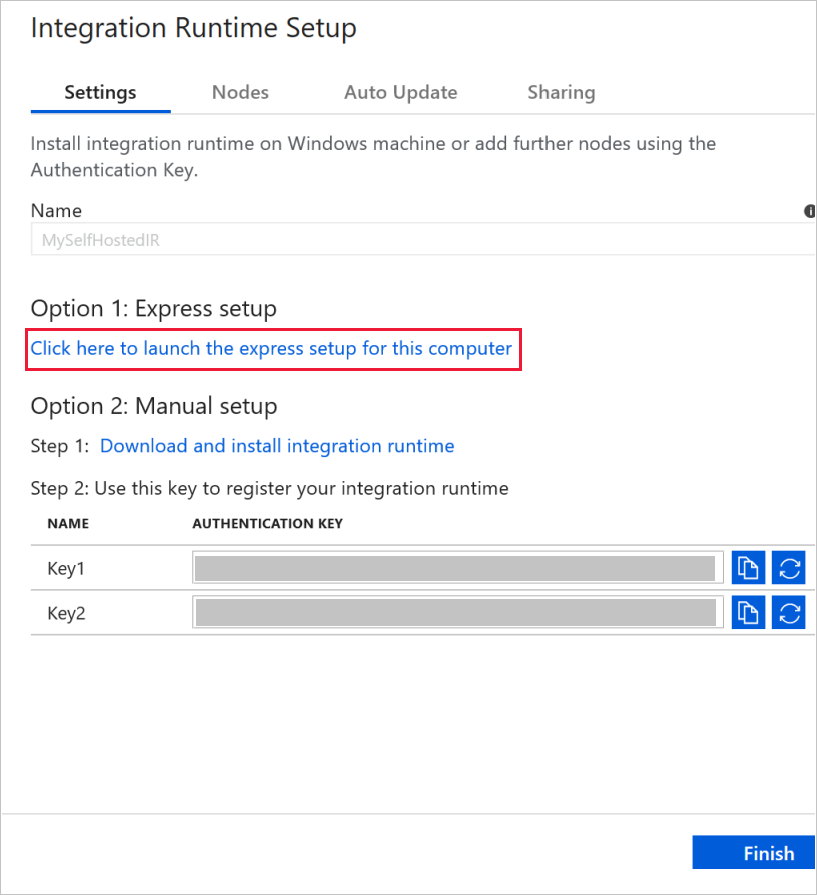
5. Enter MySelfHostedIR for Name, and click Create.
6. Click Click here to launch the express setup for this computer in the Option 1: Express setup section.
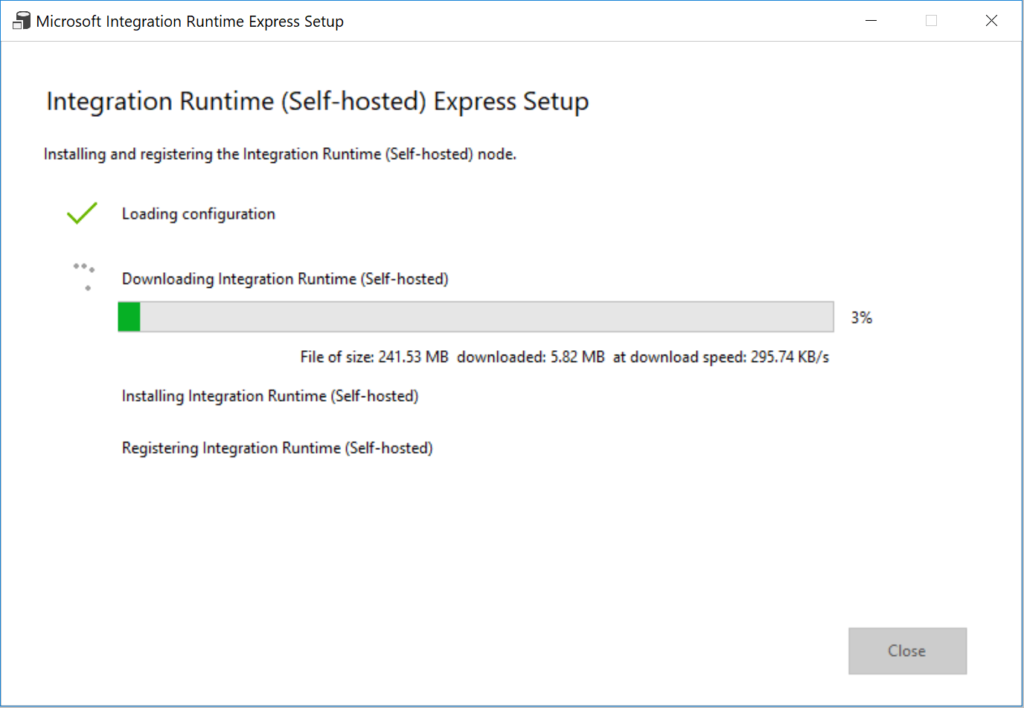
7. In the Integration Runtime (Self-hosted) Express Setup window, click Close.
8. In the Web browser, in the Integration Runtime Setup window, click Finish.
9. Confirm that you see MySelfHostedIR in the list of integration runtimes.
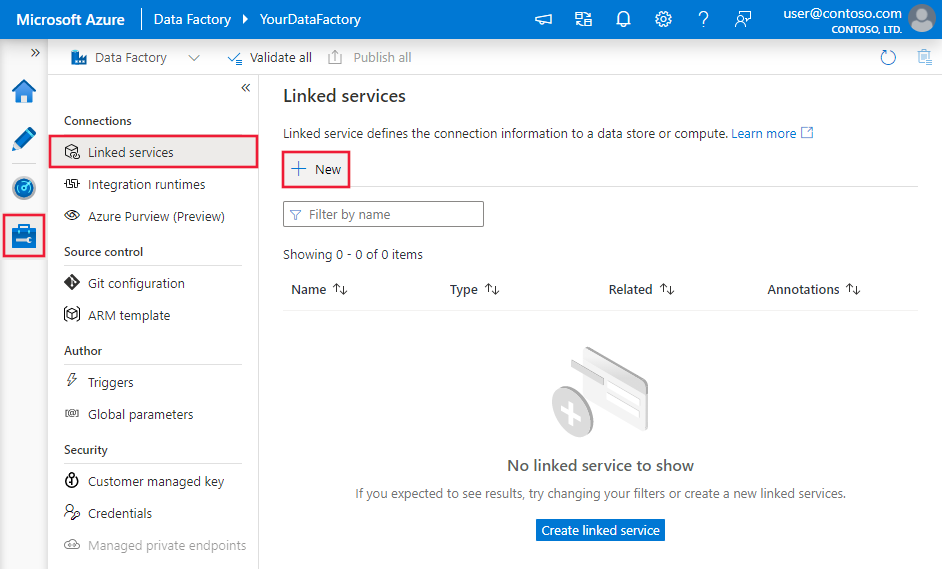
Create linked services
You create linked services in a data factory to link your data stores and compute services to the data factory. In this section, you create linked services to your SQL Server database and your database in Azure SQL Database.
Create the SQL Server linked service
In this step, you link your SQL Server database to the data factory.
- In the Connections window, switch from Integration Runtimes tab to the Linked Services tab, and click + New.
2. In the New Linked Service window, select SQL Server, and click Continue.
3. In the New Linked Service window, do the following steps:
- Enter SqlServerLinkedService for Name.
- Select MySelfHostedIR for Connect via integration runtime. This is an important step. The default integration runtime cannot connect to an on-premises data store. Use the self-hosted integration runtime you created earlier.
- For Server name, enter the name of your computer that has the SQL Server database.
- For Database name, enter the name of the database in your SQL Server that has the source data. You created a table and inserted data into this database as part of the prerequisites.
- For Authentication type, select the type of the authentication you want to use to connect to the database.
- For User name, enter the name of user that has access to the SQL Server database. If you need to use a slash character (
\) in your user account or server name, use the escape character (\). An example ismydomain\\myuser. - For Password, enter the password for the user.
- To test whether Data Factory can connect to your SQL Server database, click Test connection. Fix any errors until the connection succeeds.
- To save the linked service, click Finish.
Create the Azure SQL Database linked service
In the last step, you create a linked service to link your source SQL Server database to the data factory. In this step, you link your destination/sink database to the data factory.
- In the Connections window, switch from Integration Runtimes tab to the Linked Services tab, and click + New.
- In the New Linked Service window, select Azure SQL Database, and click Continue.
- In the New Linked Service window, do the following steps:
- Enter AzureSqlDatabaseLinkedService for Name.
- For Server name, select the name of your server from the drop-down list.
- For Database name, select the database in which you created customer_table and project_table as part of the prerequisites.
- For User name, enter the name of user that has access to the database.
- For Password, enter the password for the user.
- To test whether Data Factory can connect to your SQL Server database, click Test connection. Fix any errors until the connection succeeds.
- To save the linked service, click Finish.
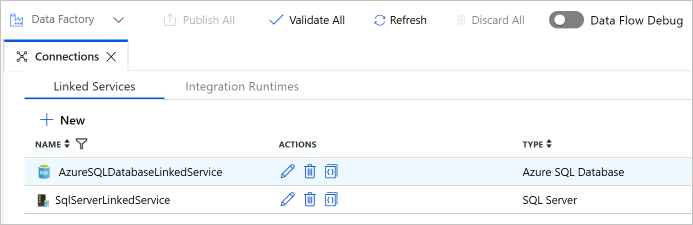
4. Confirm that you see two linked services in the list.
Create datasets
In this step, you create datasets to represent the data source, the data destination, and the place to store the watermark.
Create a source dataset
- In the left pane, click + (plus), and click Dataset.
- In the New Dataset window, select SQL Server, click Continue.
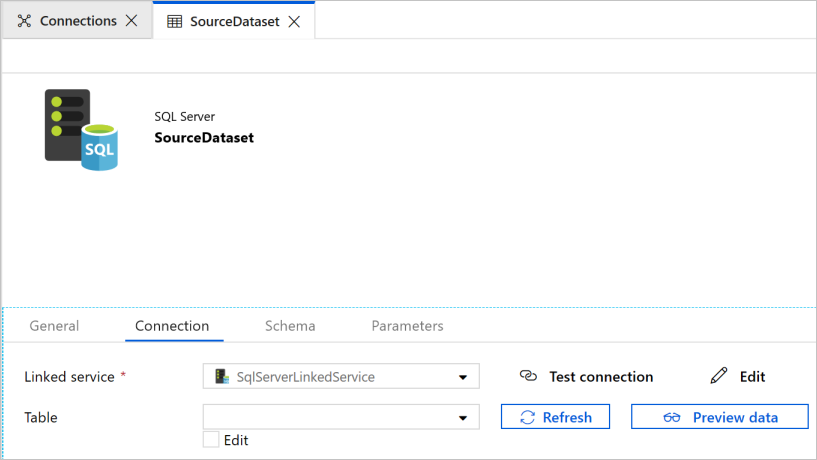
- You see a new tab opened in the Web browser for configuring the dataset. You also see a dataset in the tree view. In the General tab of the Properties window at the bottom, enter SourceDataset for Name.
- Switch to the Connection tab in the Properties window, and select SqlServerLinkedService for Linked service. You do not select a table here. The Copy activity in the pipeline uses a SQL query to load the data rather than load the entire table.
Create a sink dataset
- In the left pane, click + (plus), and click Dataset.
- In the New Dataset window, select Azure SQL Database, and click Continue.
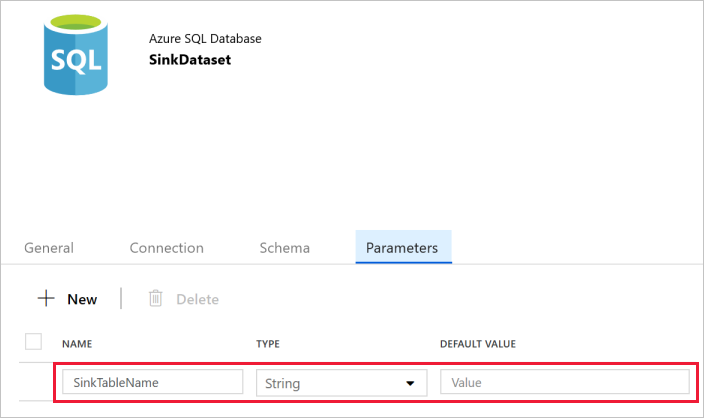
- You see a new tab opened in the Web browser for configuring the dataset. You also see a dataset in the tree view. In the General tab of the Properties window at the bottom, enter SinkDataset for Name.
- Switch to the Parameters tab in the Properties window, and do the following steps:
- Click New in the Create/update parameters section.
- Enter SinkTableName for the name, and String for the type. This dataset takes SinkTableName as a parameter. The SinkTableName parameter is set by the pipeline dynamically at runtime. The ForEach activity in the pipeline iterates through a list of table names and passes the table name to this dataset in each iteration.
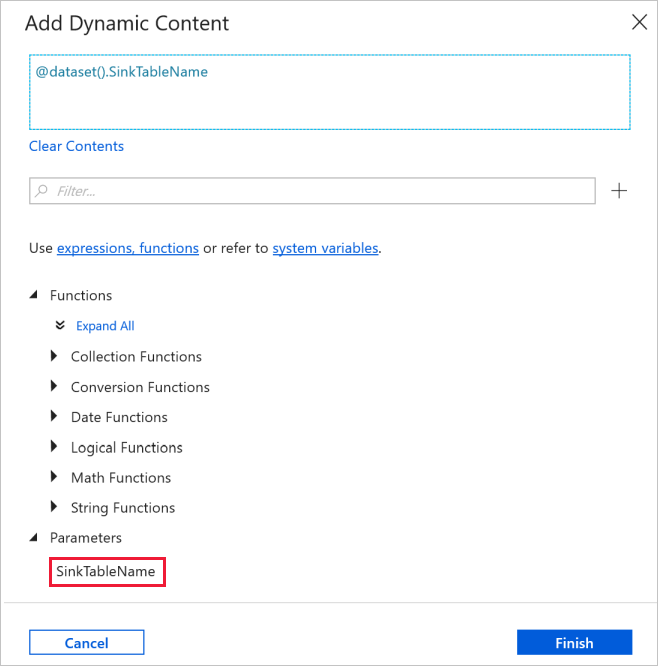
5. Switch to the Connection tab in the Properties window, and select AzureSqlDatabaseLinkedService for Linked service. For Table property, click Add dynamic content.
6. In the Add Dynamic Content window, select SinkTableName in the Parameters section.
7. After clicking Finish, you see “@dataset().SinkTableName” as the table name
Create a pipeline
The pipeline takes a list of table names as a parameter. The ForEach activity iterates through the list of table names and performs the following operations:
- Use the Lookup activity to retrieve the old watermark value (the initial value or the one that was used in the last iteration).
- Use the Lookup activity to retrieve the new watermark value (the maximum value of the watermark column in the source table).
- Use the Copy activity to copy data between these two watermark values from the source database to the destination database.
- Use the StoredProcedure activity to update the old watermark value to be used in the first step of the next iteration.
Create the pipeline
- In the left pane, click + (plus), and click Pipeline.
- In the General panel under Properties, specify IncrementalCopyPipeline for Name. Then collapse the panel by clicking the Properties icon in the top-right corner.
- In the Parameters tab, do the following steps:
- Click + New.
- Enter tableList for the parameter name.
- Select Array for the parameter type.
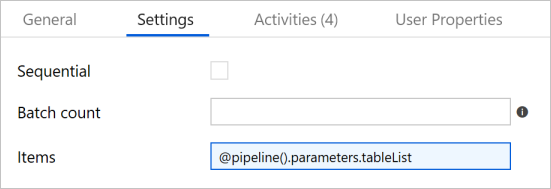
- In the Activities toolbox, expand Iteration & Conditionals, and drag-drop the ForEach activity to the pipeline designer surface. In the General tab of the Properties window, enter IterateSQLTables.
- Switch to the Settings tab, and enter
@pipeline().parameters.tableListfor Items. The ForEach activity iterates through a list of tables and performs the incremental copy operation.
6. Select the ForEach activity in the pipeline if it isn’t already selected. Click the Edit (Pencil icon) button.
7. In the Activities toolbox, expand General, drag-drop the Lookup activity to the pipeline designer surface, and enter LookupOldWaterMarkActivity for Name.
8. Switch to the Settings tab of the Properties window, and do the following steps:
- Select WatermarkDataset for Source Dataset.
- Select Query for Use Query.
- Enter the following SQL query for Query.
select * from watermarktable where TableName = '@{item().TABLE_NAME}'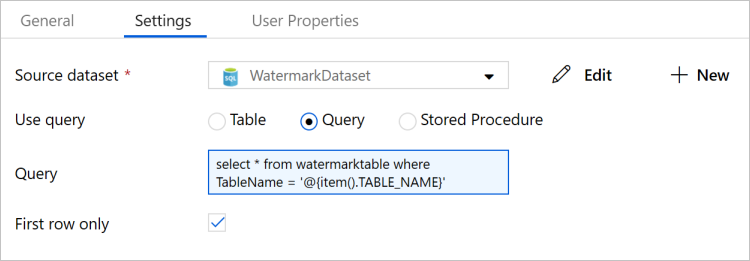
9. Drag-drop the Lookup activity from the Activities toolbox, and enter LookupNewWaterMarkActivity for Name.
10. Switch to the Settings tab.
- Select SourceDataset for Source Dataset.
- Select Query for Use Query.
- Enter the following SQL query for Query.
select MAX(@{item().WaterMark_Column}) as NewWatermarkvalue from @{item().TABLE_NAME}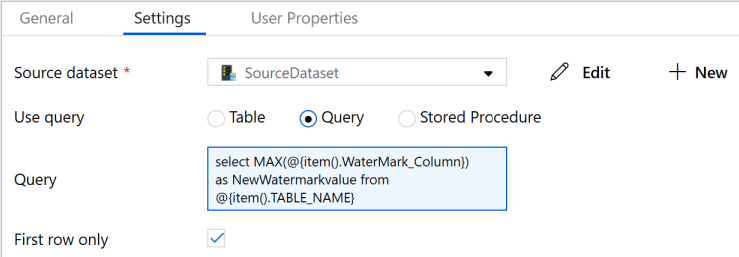
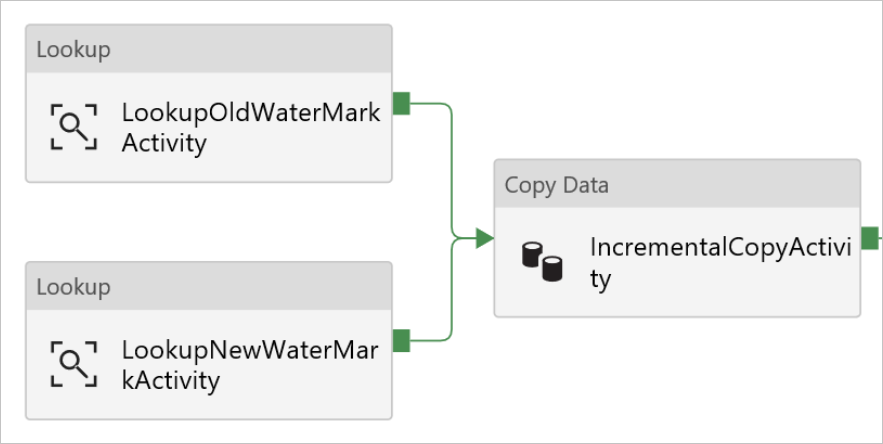
11. Drag-drop the Copy activity from the Activities toolbox, and enter IncrementalCopyActivity for Name.
12. Connect Lookup activities to the Copy activity one by one. To connect, start dragging at the green box attached to the Lookup activity and drop it on the Copy activity. Release the mouse button when the border color of the Copy activity changes to blue.
13. Select the Copy activity in the pipeline. Switch to the Source tab in the Properties window.
- Select SourceDataset for Source Dataset.
- Select Query for Use Query.
- Enter the following SQL query for Query.
select * from @{item().TABLE_NAME} where @{item().WaterMark_Column} > '@{activity('LookupOldWaterMarkActivity').output.firstRow.WatermarkValue}' and @{item().WaterMark_Column} <= '@{activity('LookupNewWaterMarkActivity').output.firstRow.NewWatermarkvalue}'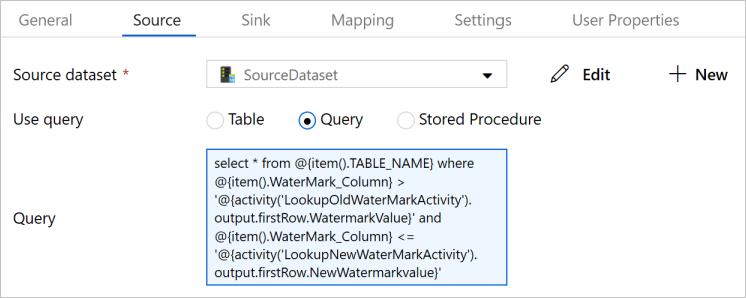
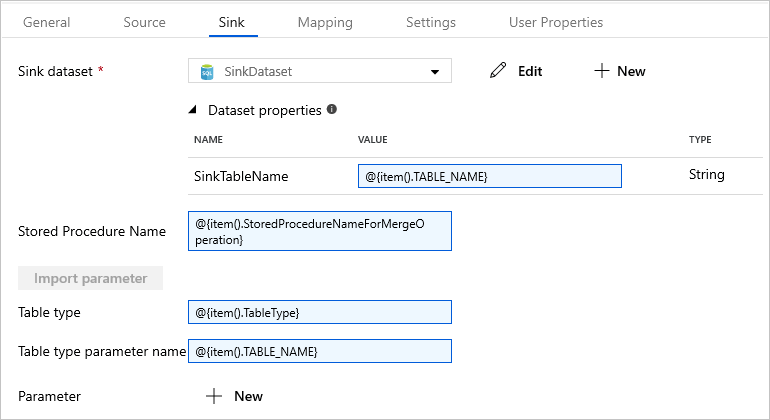
14. Switch to the Sink tab, and select SinkDataset for Sink Dataset.
15. Do the following steps:
- In the Dataset properties, for SinkTableName parameter, enter
@{item().TABLE_NAME}. - For Stored Procedure Name property, enter
@{item().StoredProcedureNameForMergeOperation}. - For Table type property, enter
@{item().TableType}. - For Table type parameter name, enter
@{item().TABLE_NAME}.
16. Drag-and-drop the Stored Procedure activity from the Activities toolbox to the pipeline designer surface. Connect the Copy activity to the Stored Procedure activity.
17. Select the Stored Procedure activity in the pipeline, and enter StoredProceduretoWriteWatermarkActivity for Name in the General tab of the Properties window.
18. Switch to the SQL Account tab, and select AzureSqlDatabaseLinkedService for Linked Service.

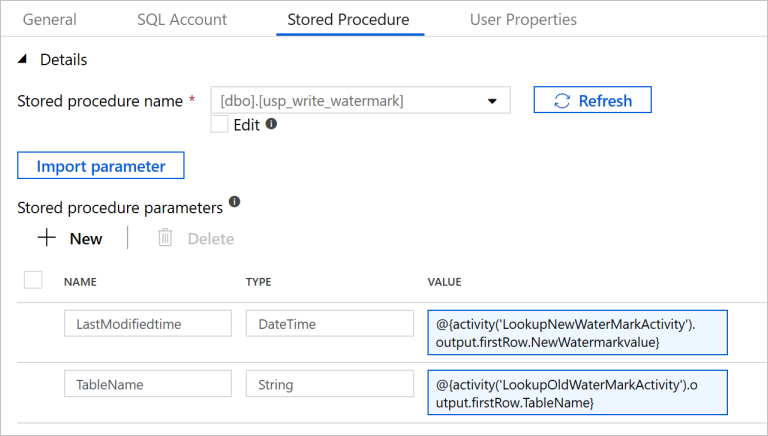
19. Switch to the Stored Procedure tab, and do the following steps:
- For Stored procedure name, select
[dbo].[usp_write_watermark]. - Select Import parameter.
- Specify the following values for the parameters:
| Name | Type | Value |
|---|---|---|
| LastModifiedtime | DateTime | @{activity('LookupNewWaterMarkActivity').output.firstRow.NewWatermarkvalue} |
| TableName | String | @{activity('LookupOldWaterMarkActivity').output.firstRow.TableName} |
20. Select Publish All to publish the entities you created to the Data Factory service.
21. Wait until you see the Successfully published message. To see the notifications, click the Show Notifications link. Close the notifications window by clicking X.
Run the pipeline
- On the toolbar for the pipeline, click Add trigger, and click Trigger Now.
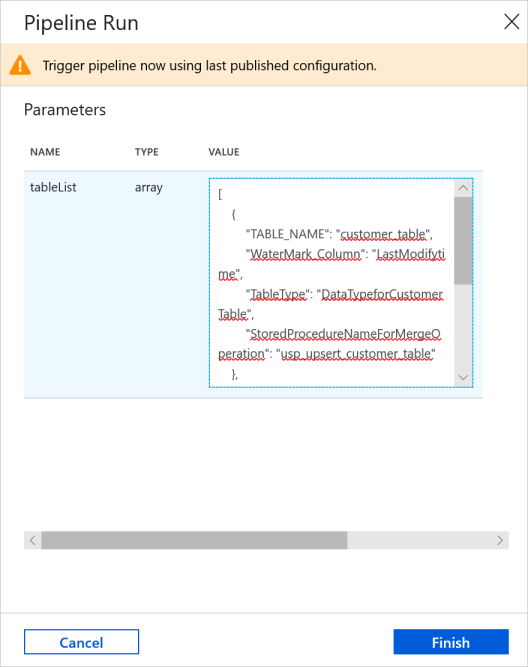
- In the Pipeline Run window, enter the following value for the tableList parameter, and click Finish.
[
    {
        "TABLE_NAME": "customer_table",
        "WaterMark_Column": "LastModifytime",
        "TableType": "DataTypeforCustomerTable",
        "StoredProcedureNameForMergeOperation": "usp_upsert_customer_table"
    },
    {
        "TABLE_NAME": "project_table",
        "WaterMark_Column": "Creationtime",
        "TableType": "DataTypeforProjectTable",
        "StoredProcedureNameForMergeOperation": "usp_upsert_project_table"
    }
]
Monitor the pipeline:
- Switch to the Monitor tab on the left. You see the pipeline run triggered by the manual trigger. You can use links under the PIPELINE NAME column to view activity details and to rerun the pipeline.
- To see activity runs associated with the pipeline run, select the link under the PIPELINE NAME column. For details about the activity runs, select the Details link (eyeglasses icon) under the ACTIVITY NAME column.
- Select All pipeline runs at the top to go back to the Pipeline Runs view. To refresh the view, select Refresh.
Leave a Reply